


Scan Module
Asset Scanning & Code Capture
The Scan module is the frontline tool for identifying equipment in the warehouse. It enables rapid reading of barcode labels and QR codes affixed to industrial tools, machinery, and technical hardware.
Interactive Scan Demo
Section titled “Interactive Scan Demo”Test out the barcode scanning features and alternative input methods:
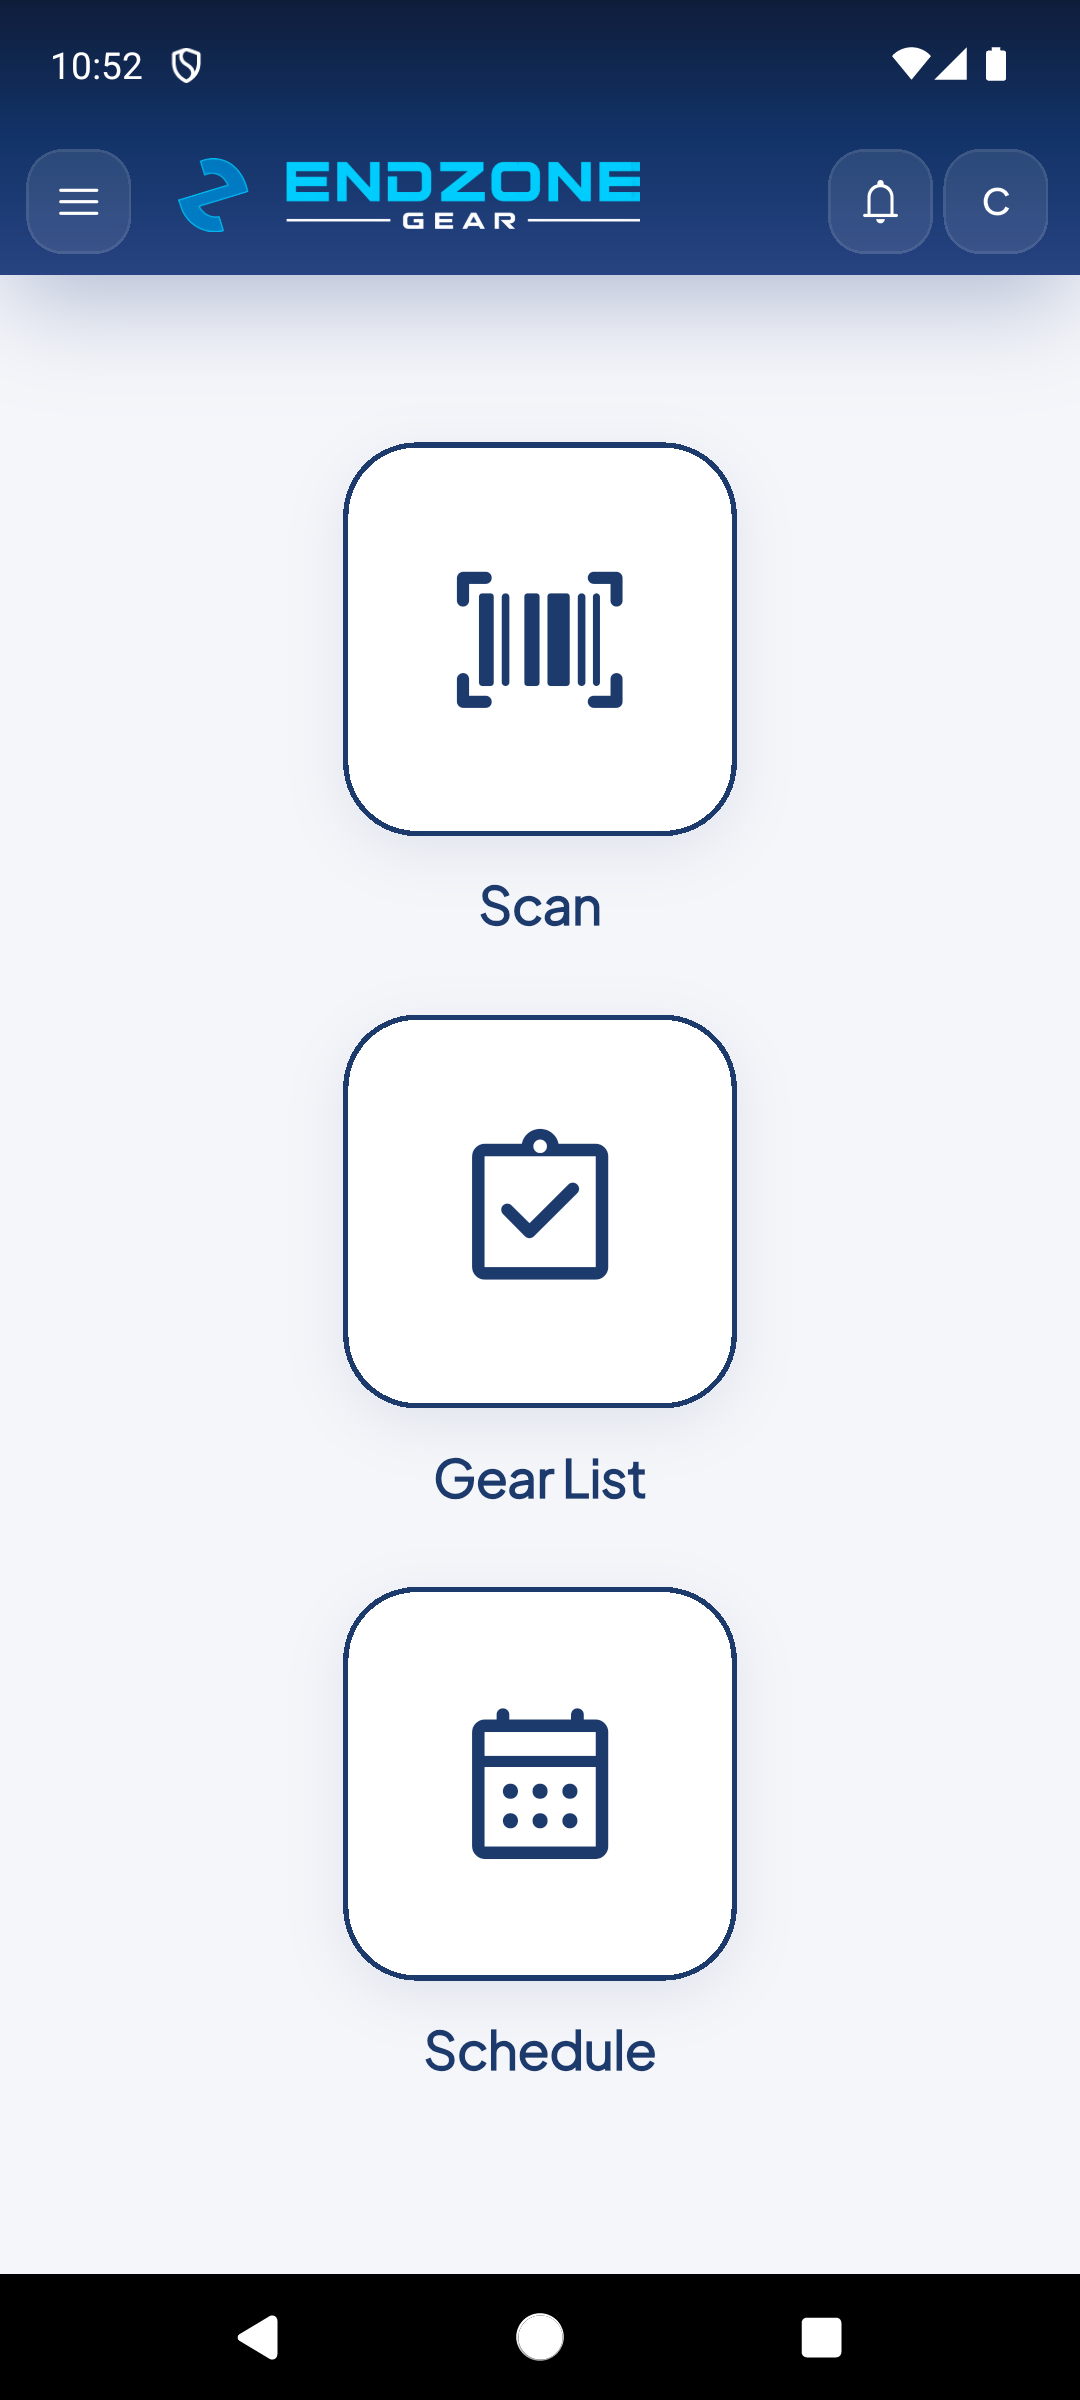
From the EndZone Gear main menu, tap the 'Scan' card to open the scanning module. You can also access 'Gear List' to browse inventory or 'Schedule' for scheduled tasks.
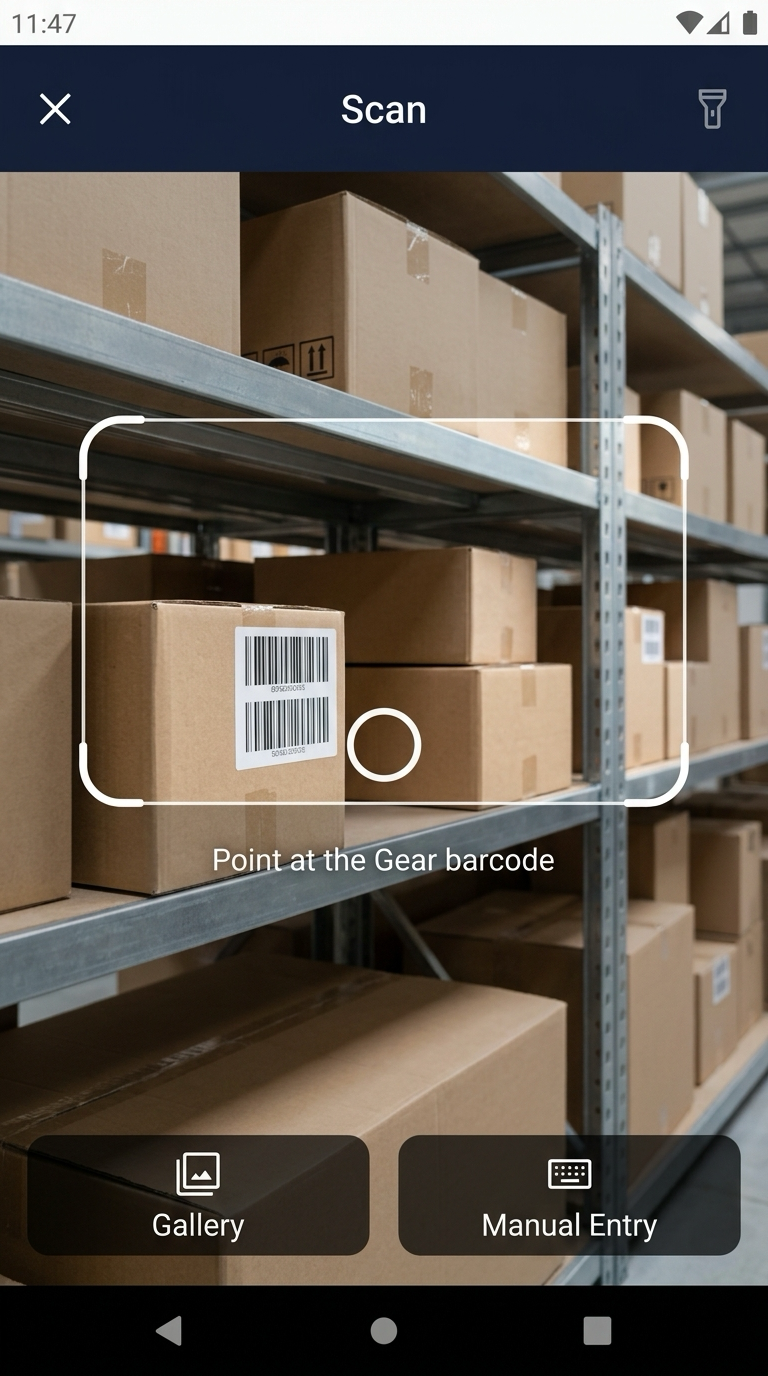
Point the camera reticle at the asset's barcode or QR code. Toggle the flashlight on the top right, pick an image from your photo gallery on the bottom left, or enter codes manually on the bottom right.
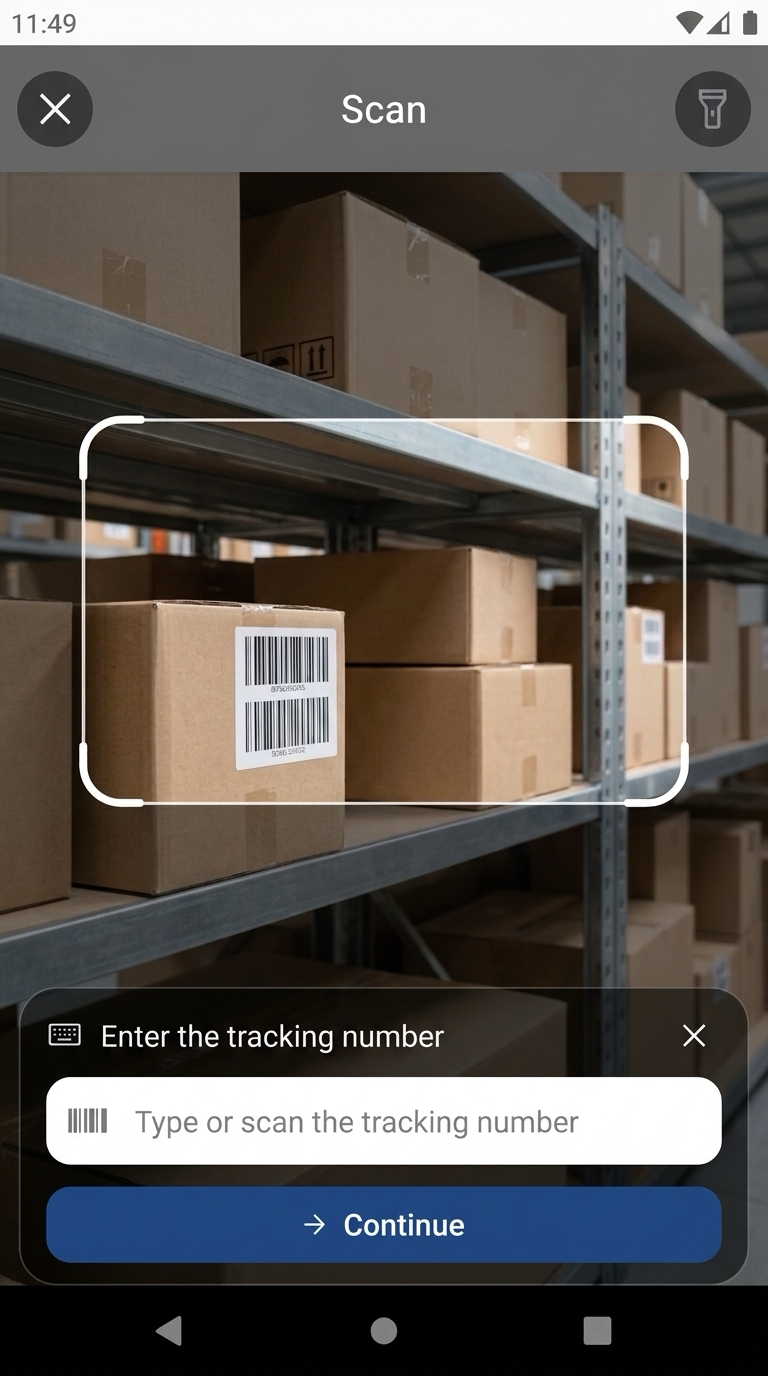
If a barcode tag is scratched or lighting is poor, tap 'Manual Entry'. Enter the serial number or tracking code and tap 'Continue' to look up the item.
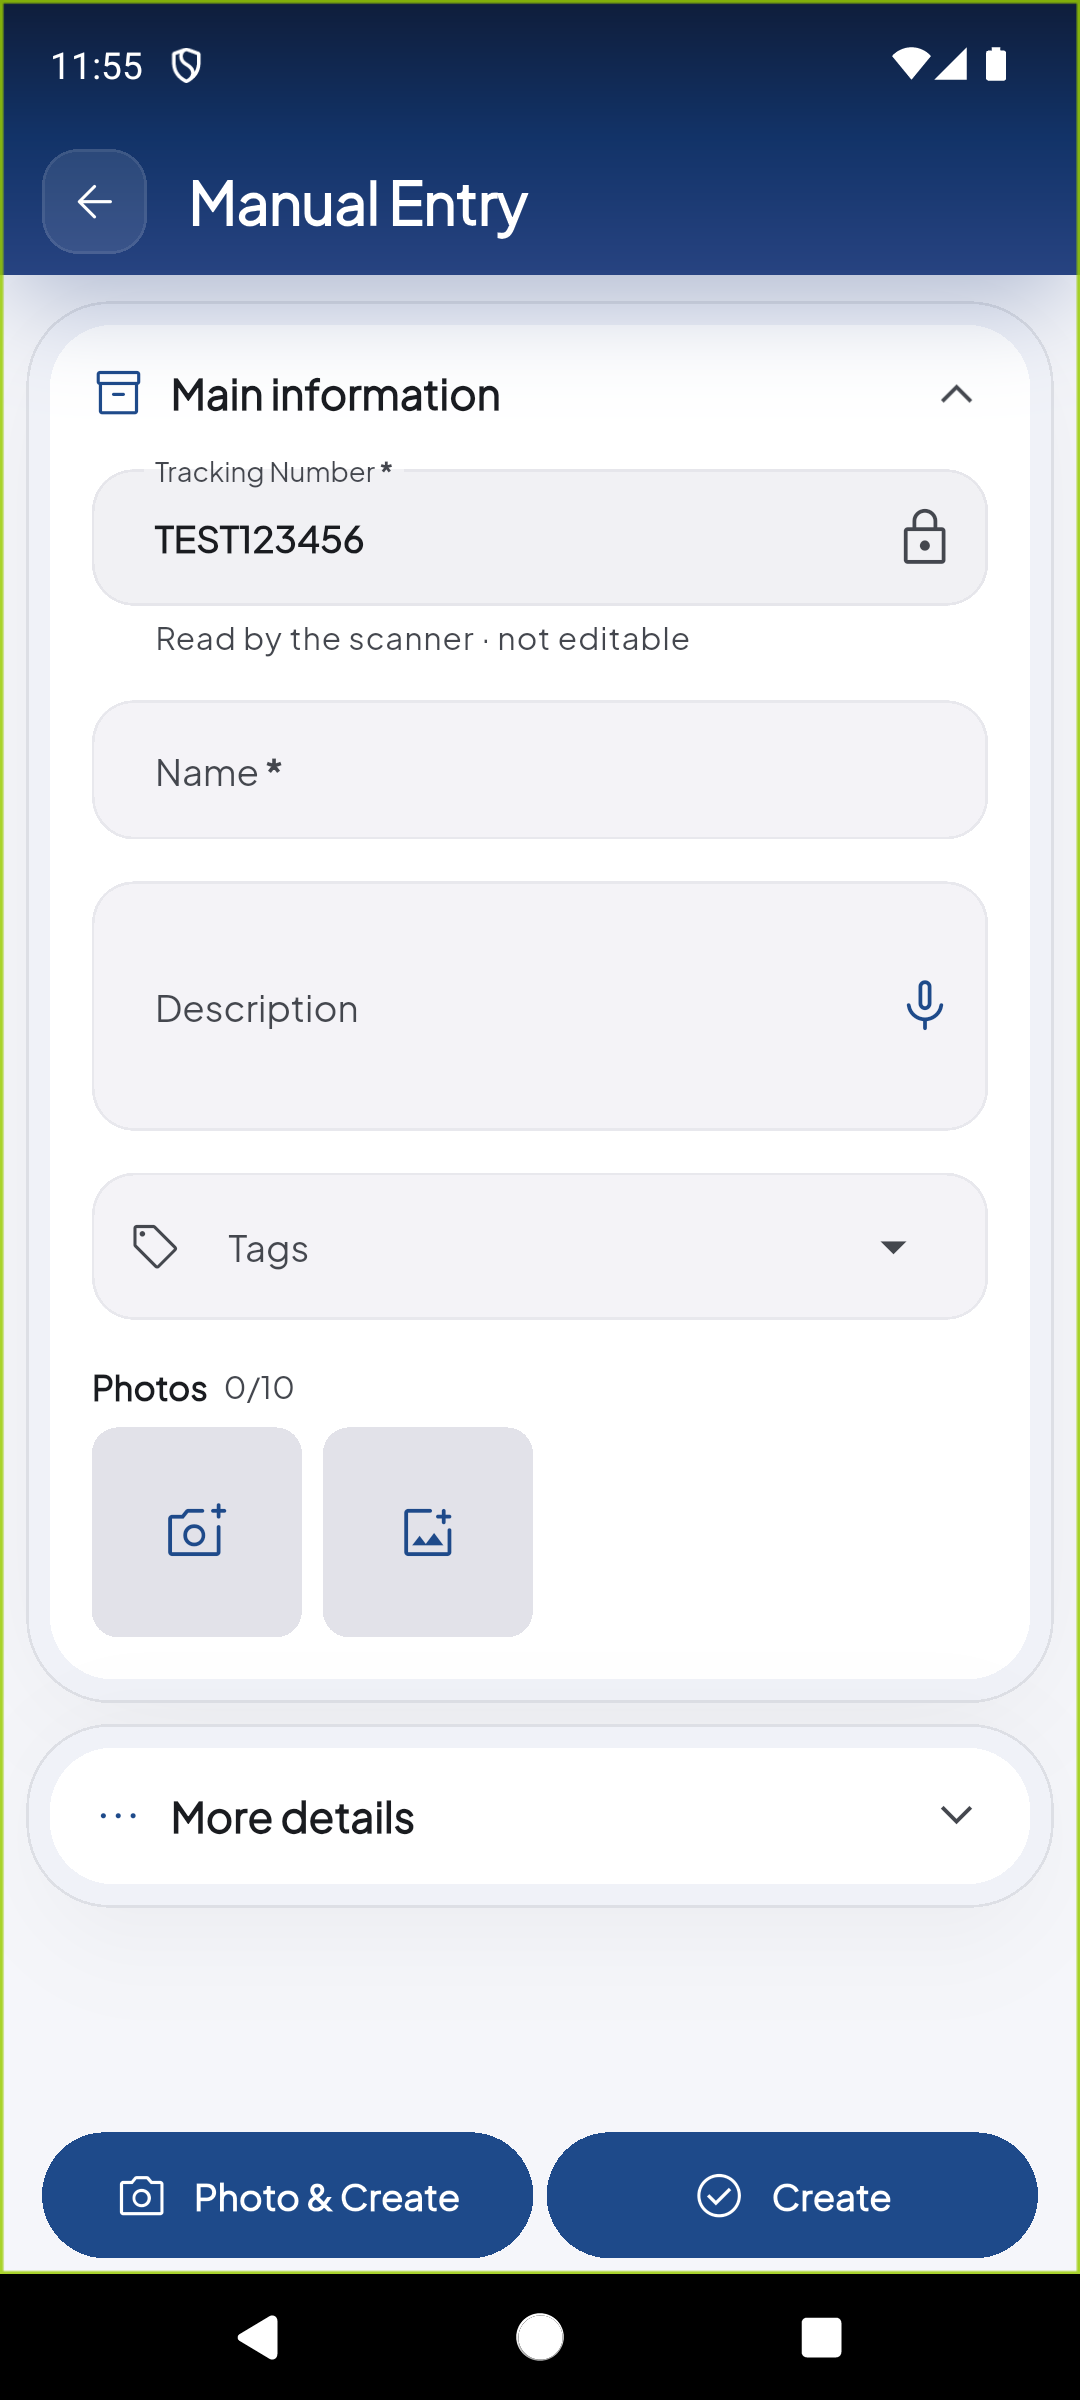
When the scanned code does not exist in the inventory, the 'Manual Entry' form appears. The Tracking Number is locked (🔒). Fill in the Name, Description (with voice dictation 🎤), Tags, and Photos (0/10) fields. Below you'll see the collapsed 'More details' section.
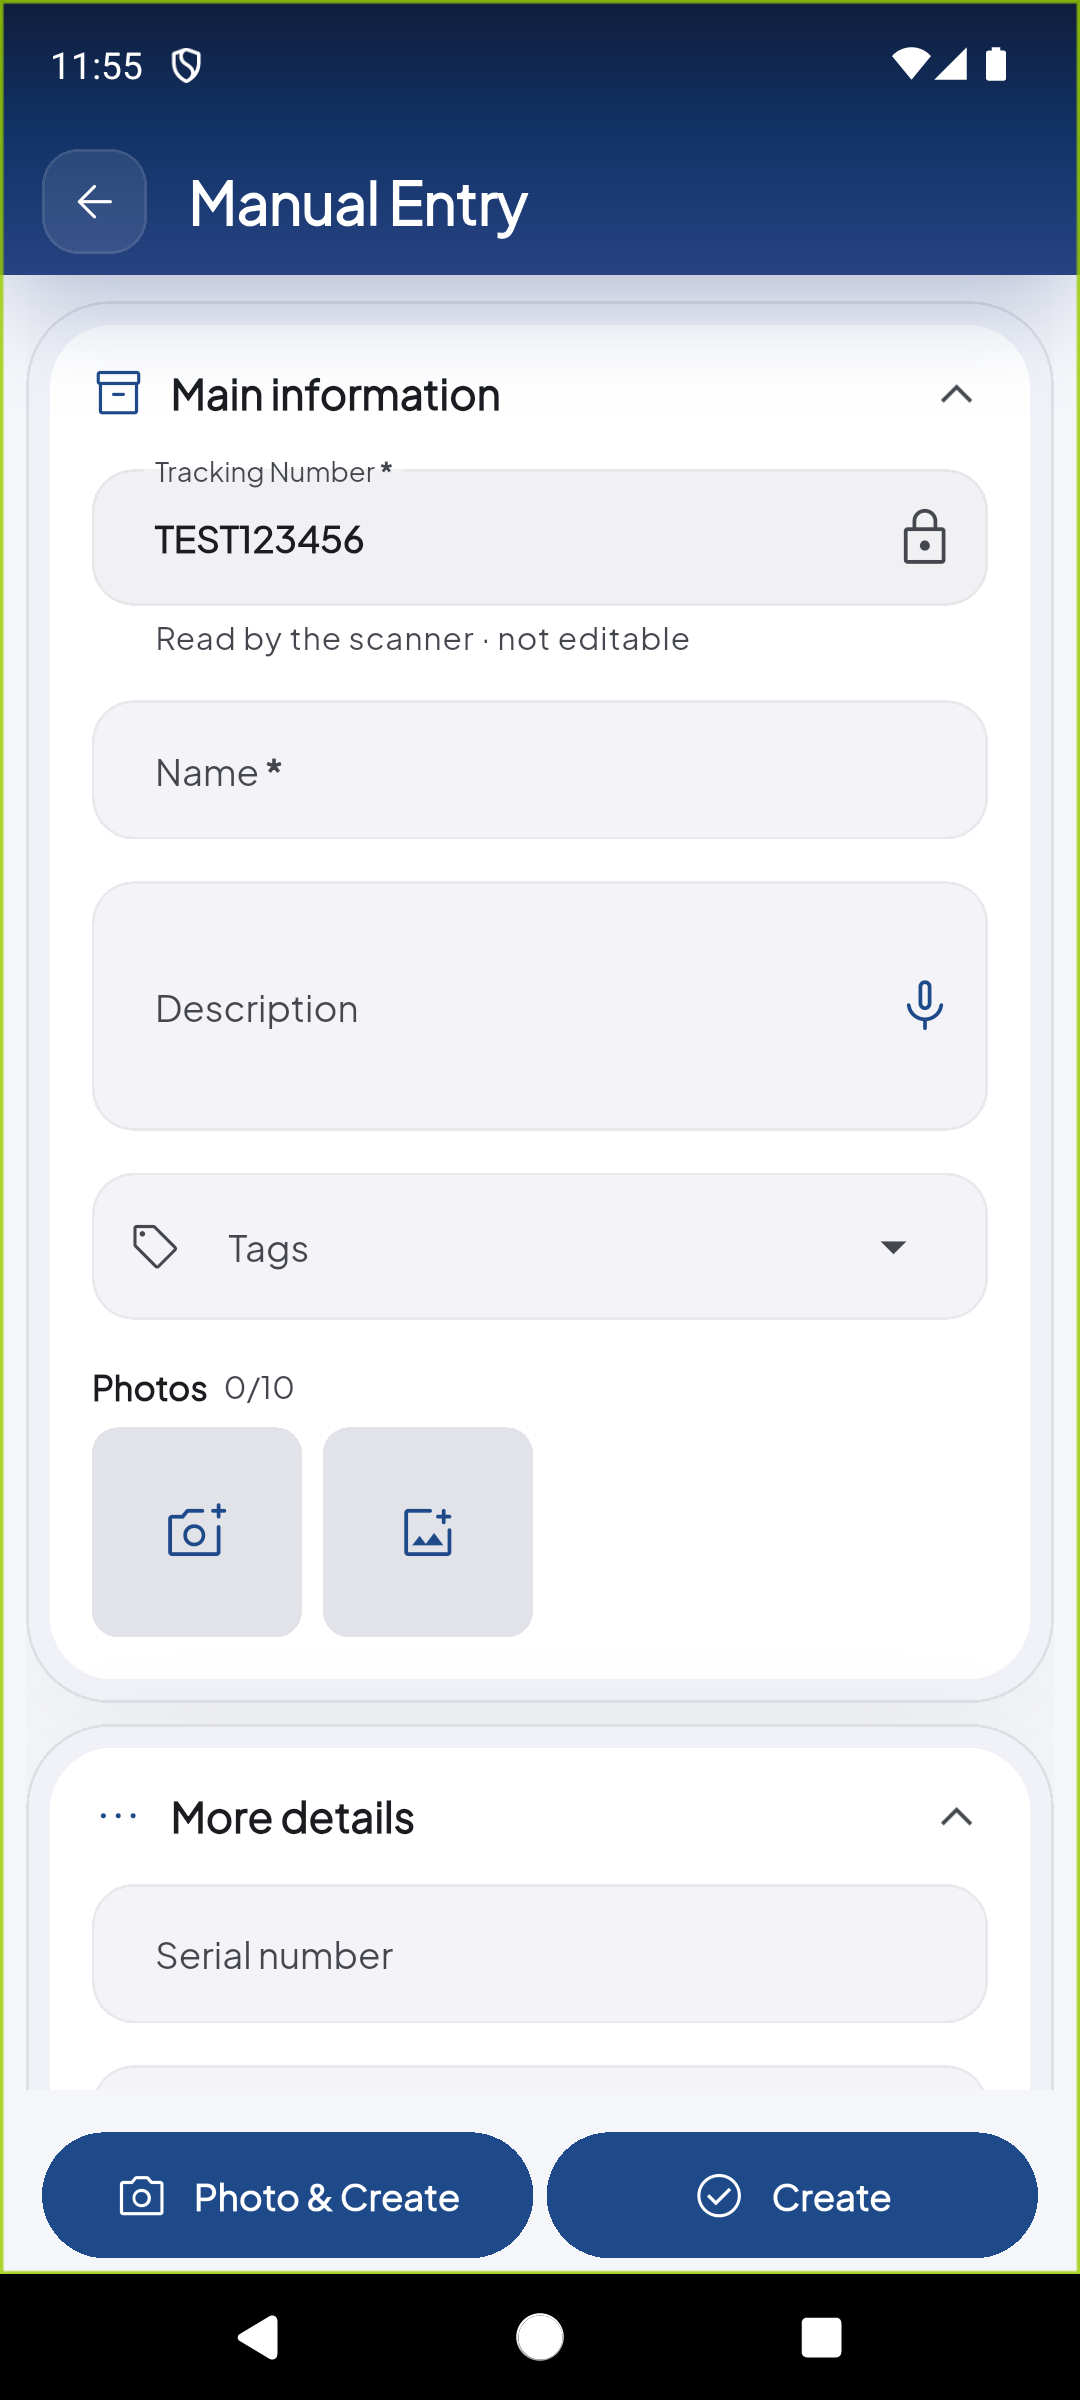
Tap 'More details' to reveal additional optional fields: Serial number, Model, Notes, and References. This view shows the transition with the Serial number field already visible.
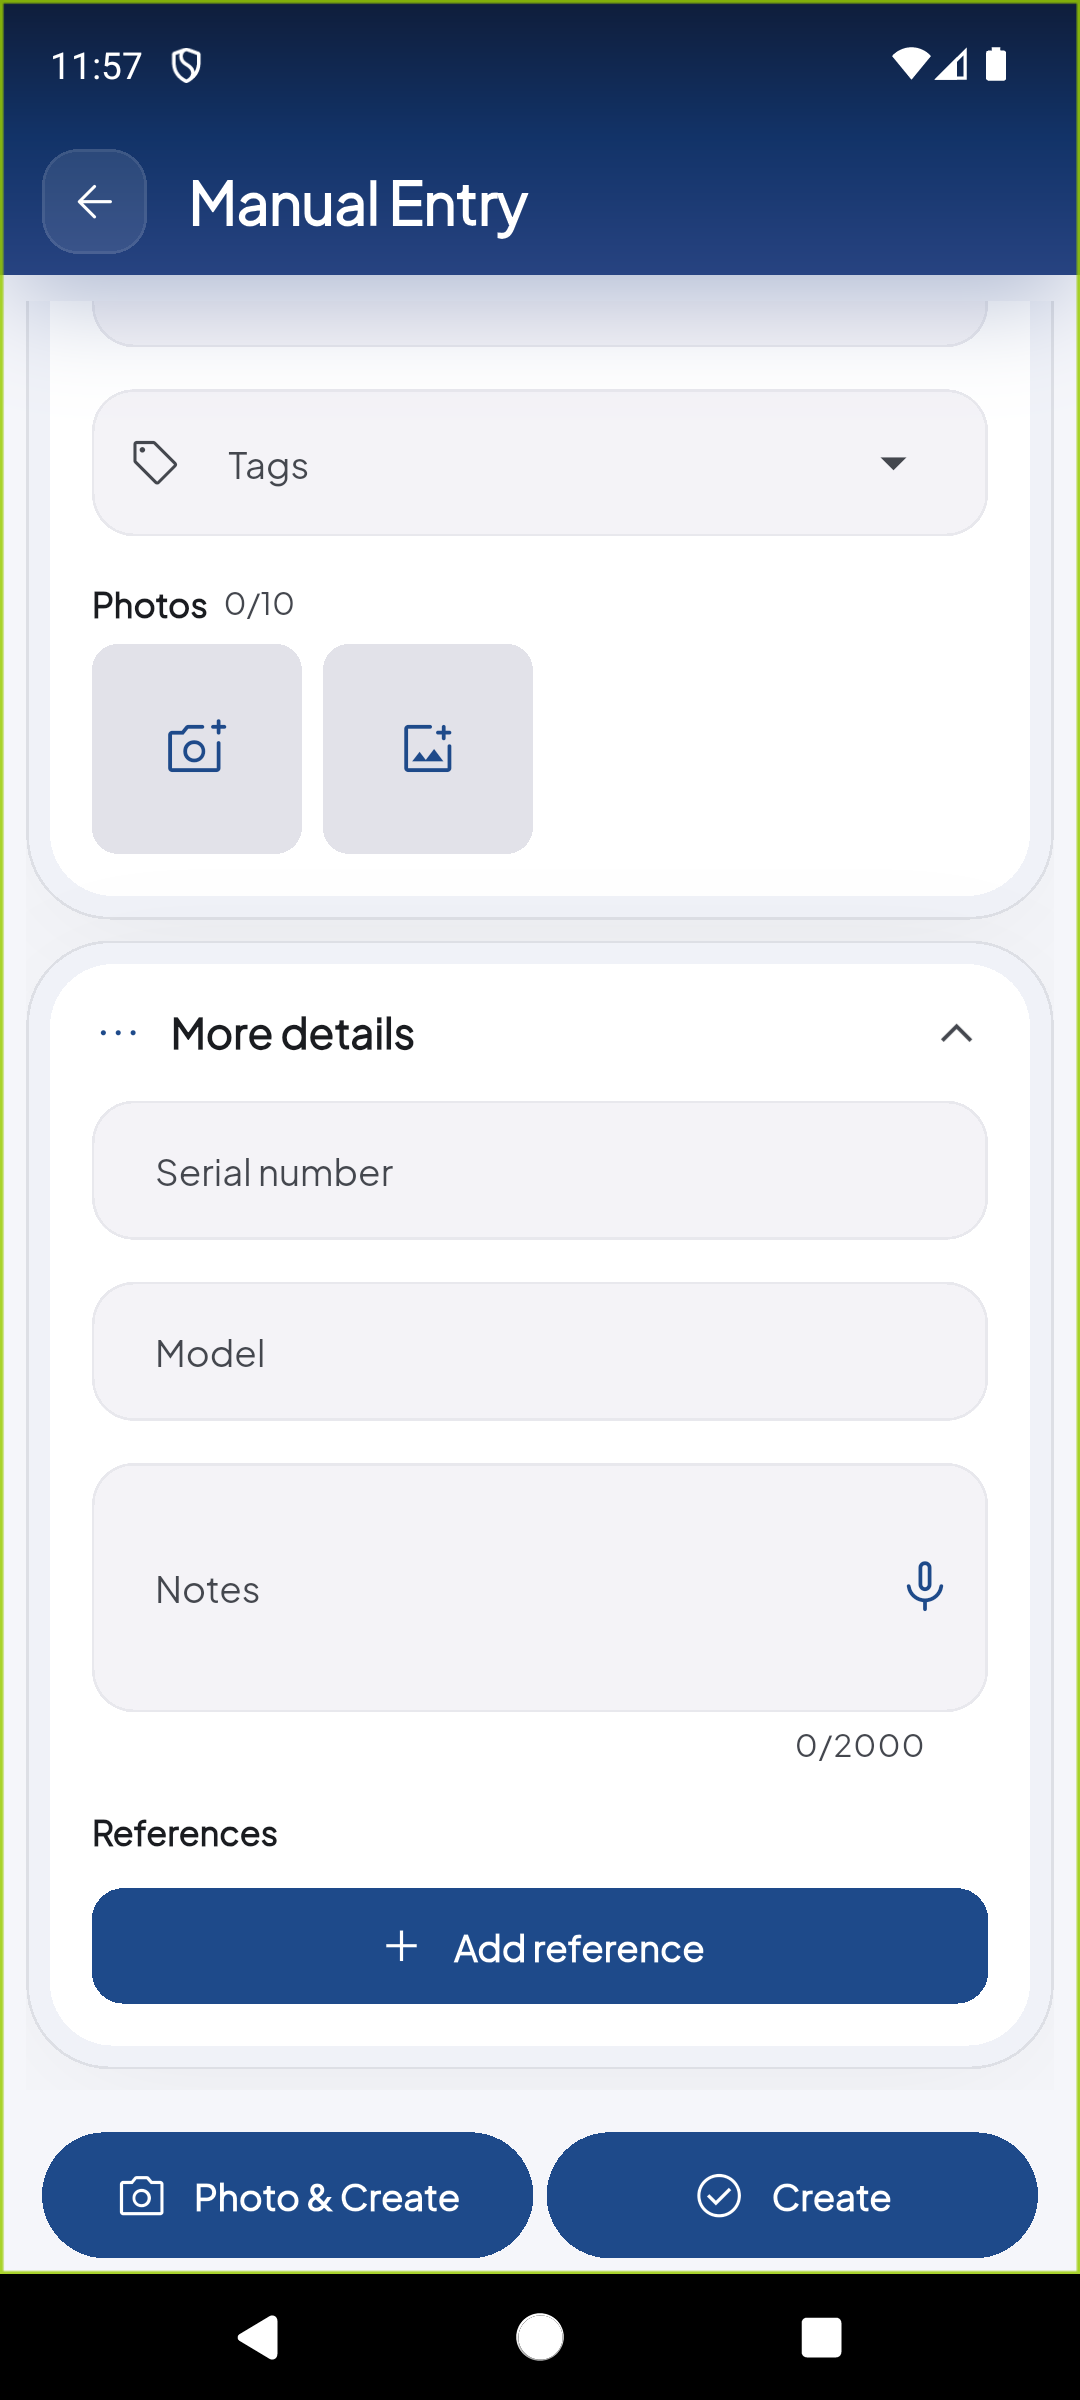
Full view of 'More details': Serial number, Model, Notes (with voice dictation 🎤, up to 2000 chars), and References (+ Add reference). At the bottom, tap 'Photo & Create' (📷) to snap a photo and register, or 'Create' (✅) to register directly.
Demo completed!
Scanner Capabilities
Section titled “Scanner Capabilities”1. Automatic Camera Recognition
Section titled “1. Automatic Camera Recognition”Upon opening the module, the camera automatically activates with a centered reticle. The optical engine reads standard 1D and 2D symbologies in real time:
- Code 128 / Code 39: Industrial inventory barcodes and tracking labels.
- QR Code & DataMatrix: High-density 2D matrix codes commonly used on compact electronic tools.
- UPC / EAN: Standard commercial product identifiers.
2. Flashlight / Torch Control
Section titled “2. Flashlight / Torch Control”In dimly lit warehouse corners, aisles, or enclosed storage rooms, tap the Flashlight icon in the upper-right corner to toggle the device’s LED flash, eliminating glare and shadows for faster recognition.
3. Image Import from Gallery
Section titled “3. Image Import from Gallery”In the lower-left corner, the Gallery icon allows selecting a photo already saved on your phone. The barcode engine decodes barcodes directly from photos without requiring you to point your camera at the physical item again.
4. Manual Code Entry (Type Manually)
Section titled “4. Manual Code Entry (Type Manually)”When a label is torn, smudged, or obstructed:
- Tap the Type manually button in the lower-right corner.
- The Manual entry modal will appear.
- Type the tracking code or serial number into the Enter tracking number field.
- Tap Continue to retrieve the asset record.
Reception Form (New Code)
Section titled “Reception Form (New Code)”When you scan or manually enter a code that does not exist in the current inventory, EndZone Gear automatically displays a reception form to register the new asset. This workflow enables field operators to onboard new equipment directly from the warehouse floor without accessing the web platform.
When Does It Appear?
Section titled “When Does It Appear?”The form is triggered in either of these scenarios:
- Scanning a new barcode that has no matching record in the database.
- Manual entry of a tracking number that returns no results after tapping Continue.
Form Fields — Main Information
Section titled “Form Fields — Main Information”| Field | Required | Description |
|---|---|---|
| Tracking Number | ✅ | Scanned or typed code — auto-filled and locked (🔒 Read by the scanner · not editable) |
| Name | ✅ | Descriptive name for the asset (e.g., “Bosch GBH 2-26 Drill”) |
| Description | — | Free-text field with voice dictation 🎤 support to describe equipment characteristics |
| Tags | — | Dropdown selector for predefined labels to classify the asset |
| Photos | — | Up to 10 photos of the asset — direct camera capture 📷 or gallery selection 🖼️ |
Form Fields — More Details
Section titled “Form Fields — More Details”Expanding the “More details” section reveals additional optional fields:
| Field | Description |
|---|---|
| Serial number | Manufacturer serial number of the equipment |
| Model | Equipment or asset model |
| Notes | Additional notes with voice dictation 🎤 support (up to 2000 characters) |
| References | Add extra references using the ”+ Add reference” button |
Step-by-Step Flow
Section titled “Step-by-Step Flow”- Scan or type the new asset code.
- The system detects the code does not exist → displays the reception form titled “Manual Entry”.
- Fill in the required fields: Name (the tracking number is already pre-loaded and locked).
- Optionally add description, tags, photos, and additional details.
- Tap one of the two action buttons:
- 📷 Photo & Create — Take a photo of the asset and register it in one step.
- ✅ Create — Register the asset directly without an additional photo.
- The asset is immediately added to the Gear inventory and becomes visible in the Gear List module.
Automatic Sync
Upon confirming the reception, the new asset is automatically synchronized with the central Shipedge server. Other operators with access to the same facility will see the asset in their inventory immediately.