



Gear Inventory (Gear List)
Asset Inventory Management
The Gear List module houses the entire catalog of technical assets, tools, devices, and operational equipment registered within the active facility. It gives operators complete visibility over physical locations, operational statuses, photo logs, and warehouse slot assignments.
Interactive Inventory Demo
Section titled “Interactive Inventory Demo”Follow the interactive walkthrough to learn how to search, filter, edit, and relocate assets:
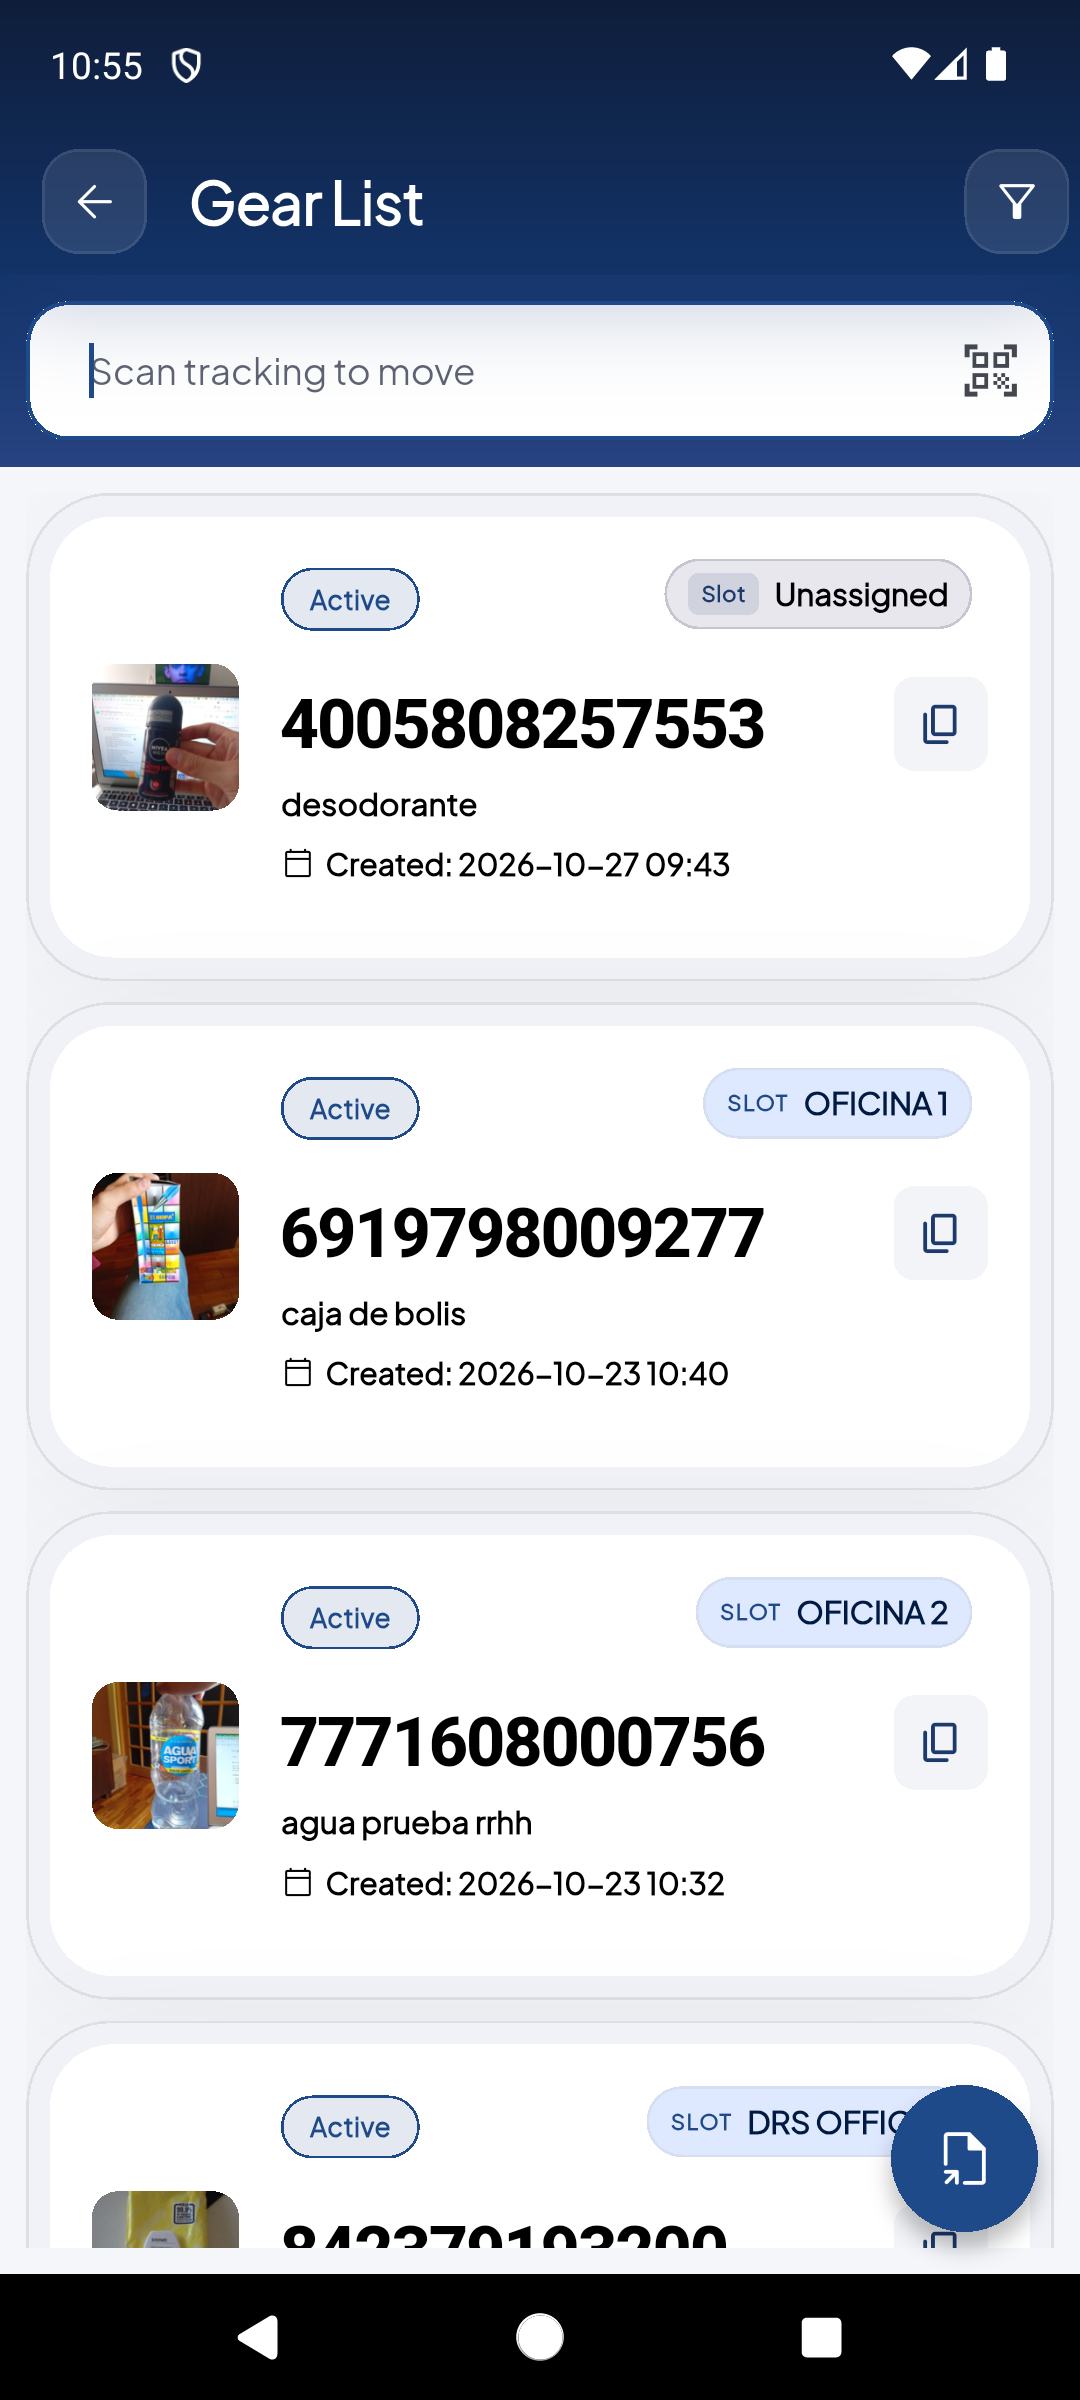
View registered assets with tracking IDs, current location (e.g., 'DRS OFFICE2', 'OFICINA'), and status badges. Use the top search bar or tap the filter button.
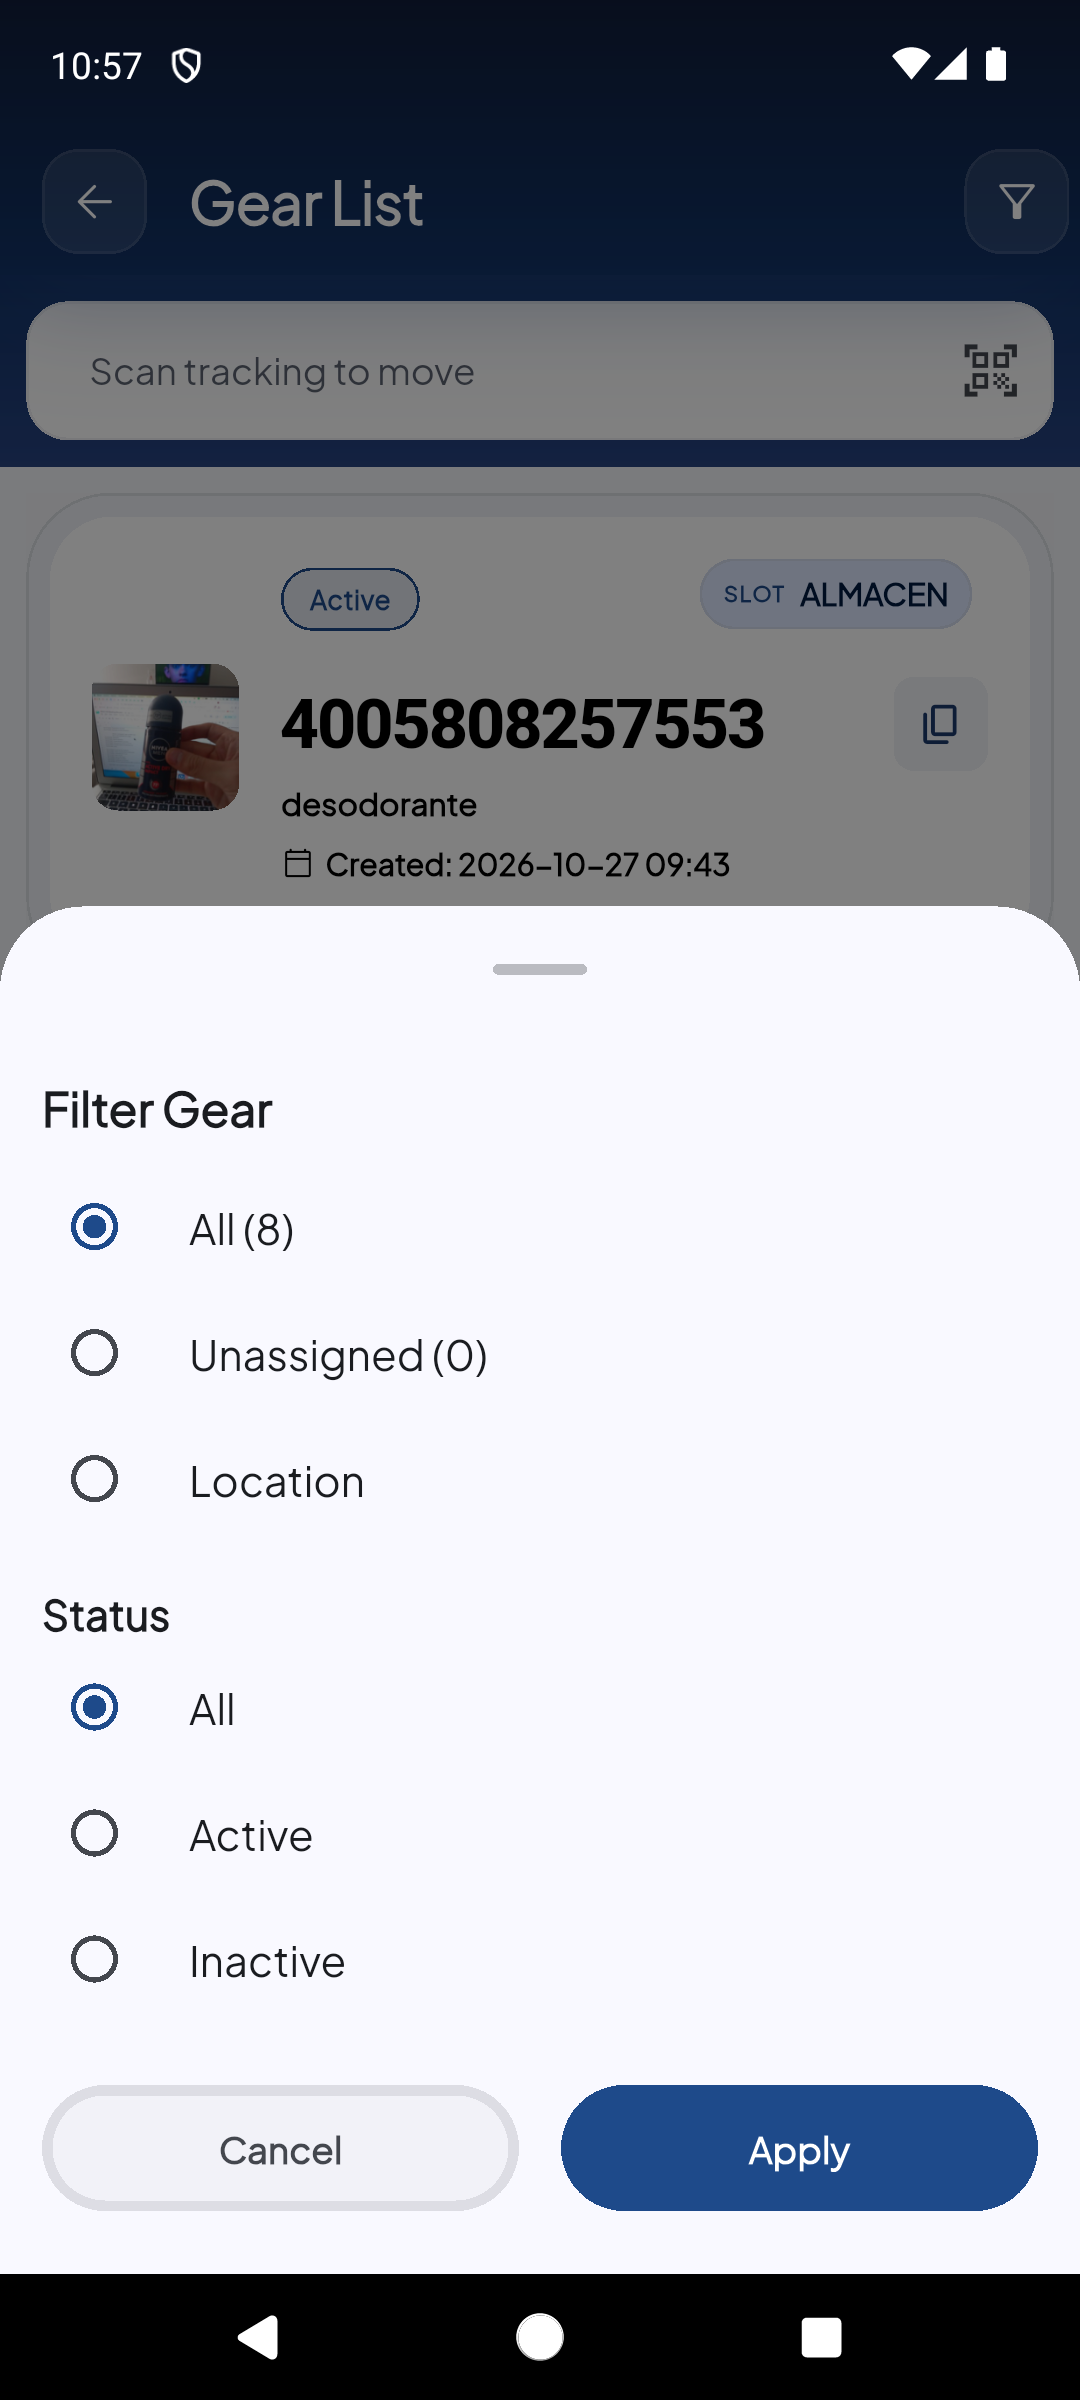
Filter by warehouse location ('DRS OFFICE2', 'OFICINA', 'PISO 3', 'ALMACEN', etc.) and operational status ('All', 'Active', 'Inactive'). Tap 'Apply' to update.
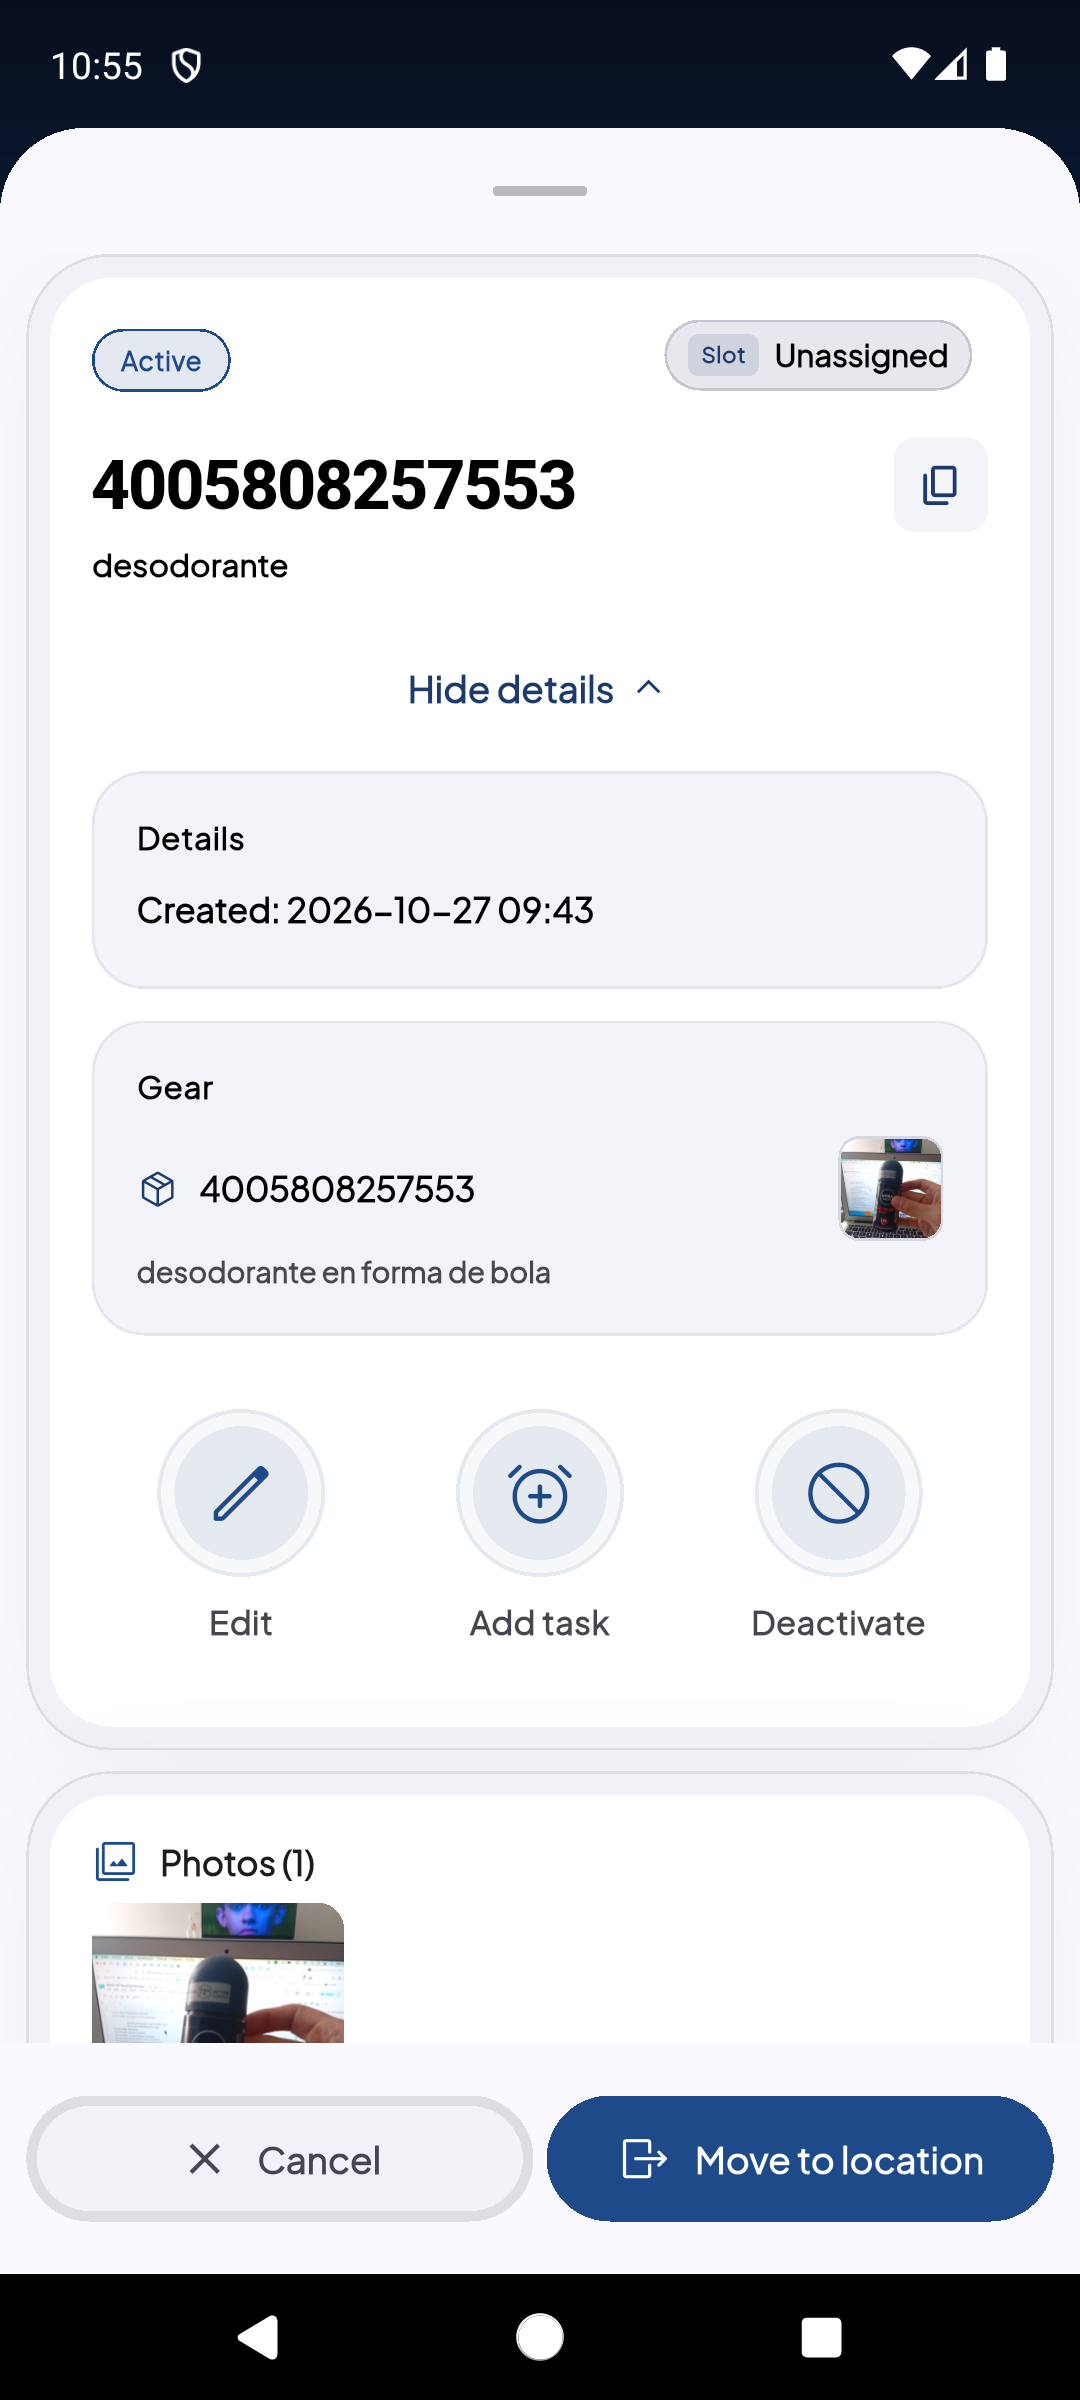
Tapping any item opens its technical sheet with photo carousel, barcode representation, and action buttons: 'Edit', 'Add Task', 'Move to location', and 'Deactivate'.
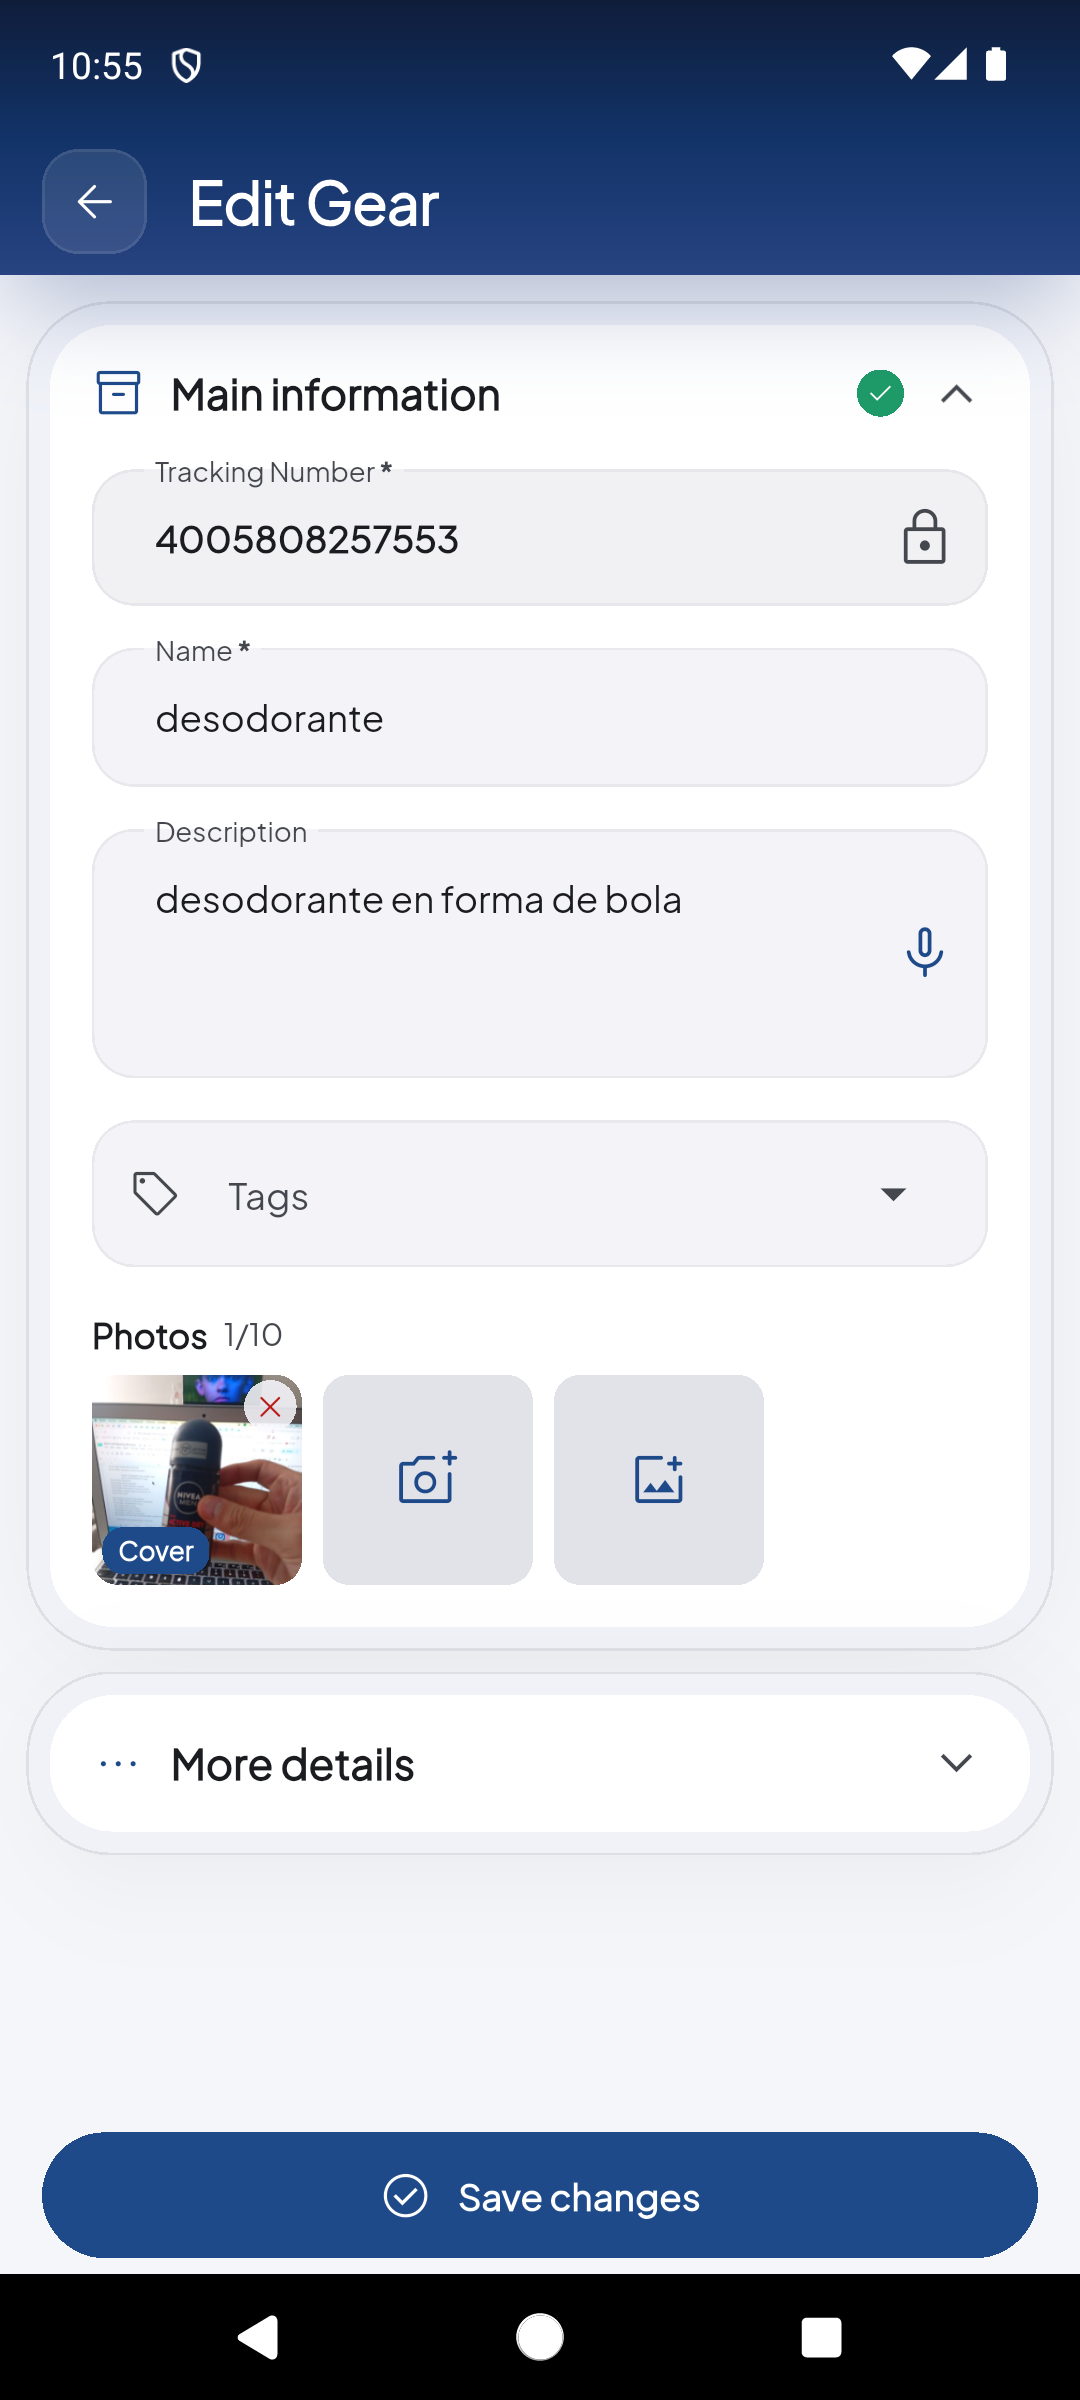
Update item name, description, tags, attach up to 10 photos documenting physical condition, and enter technical notes before saving.
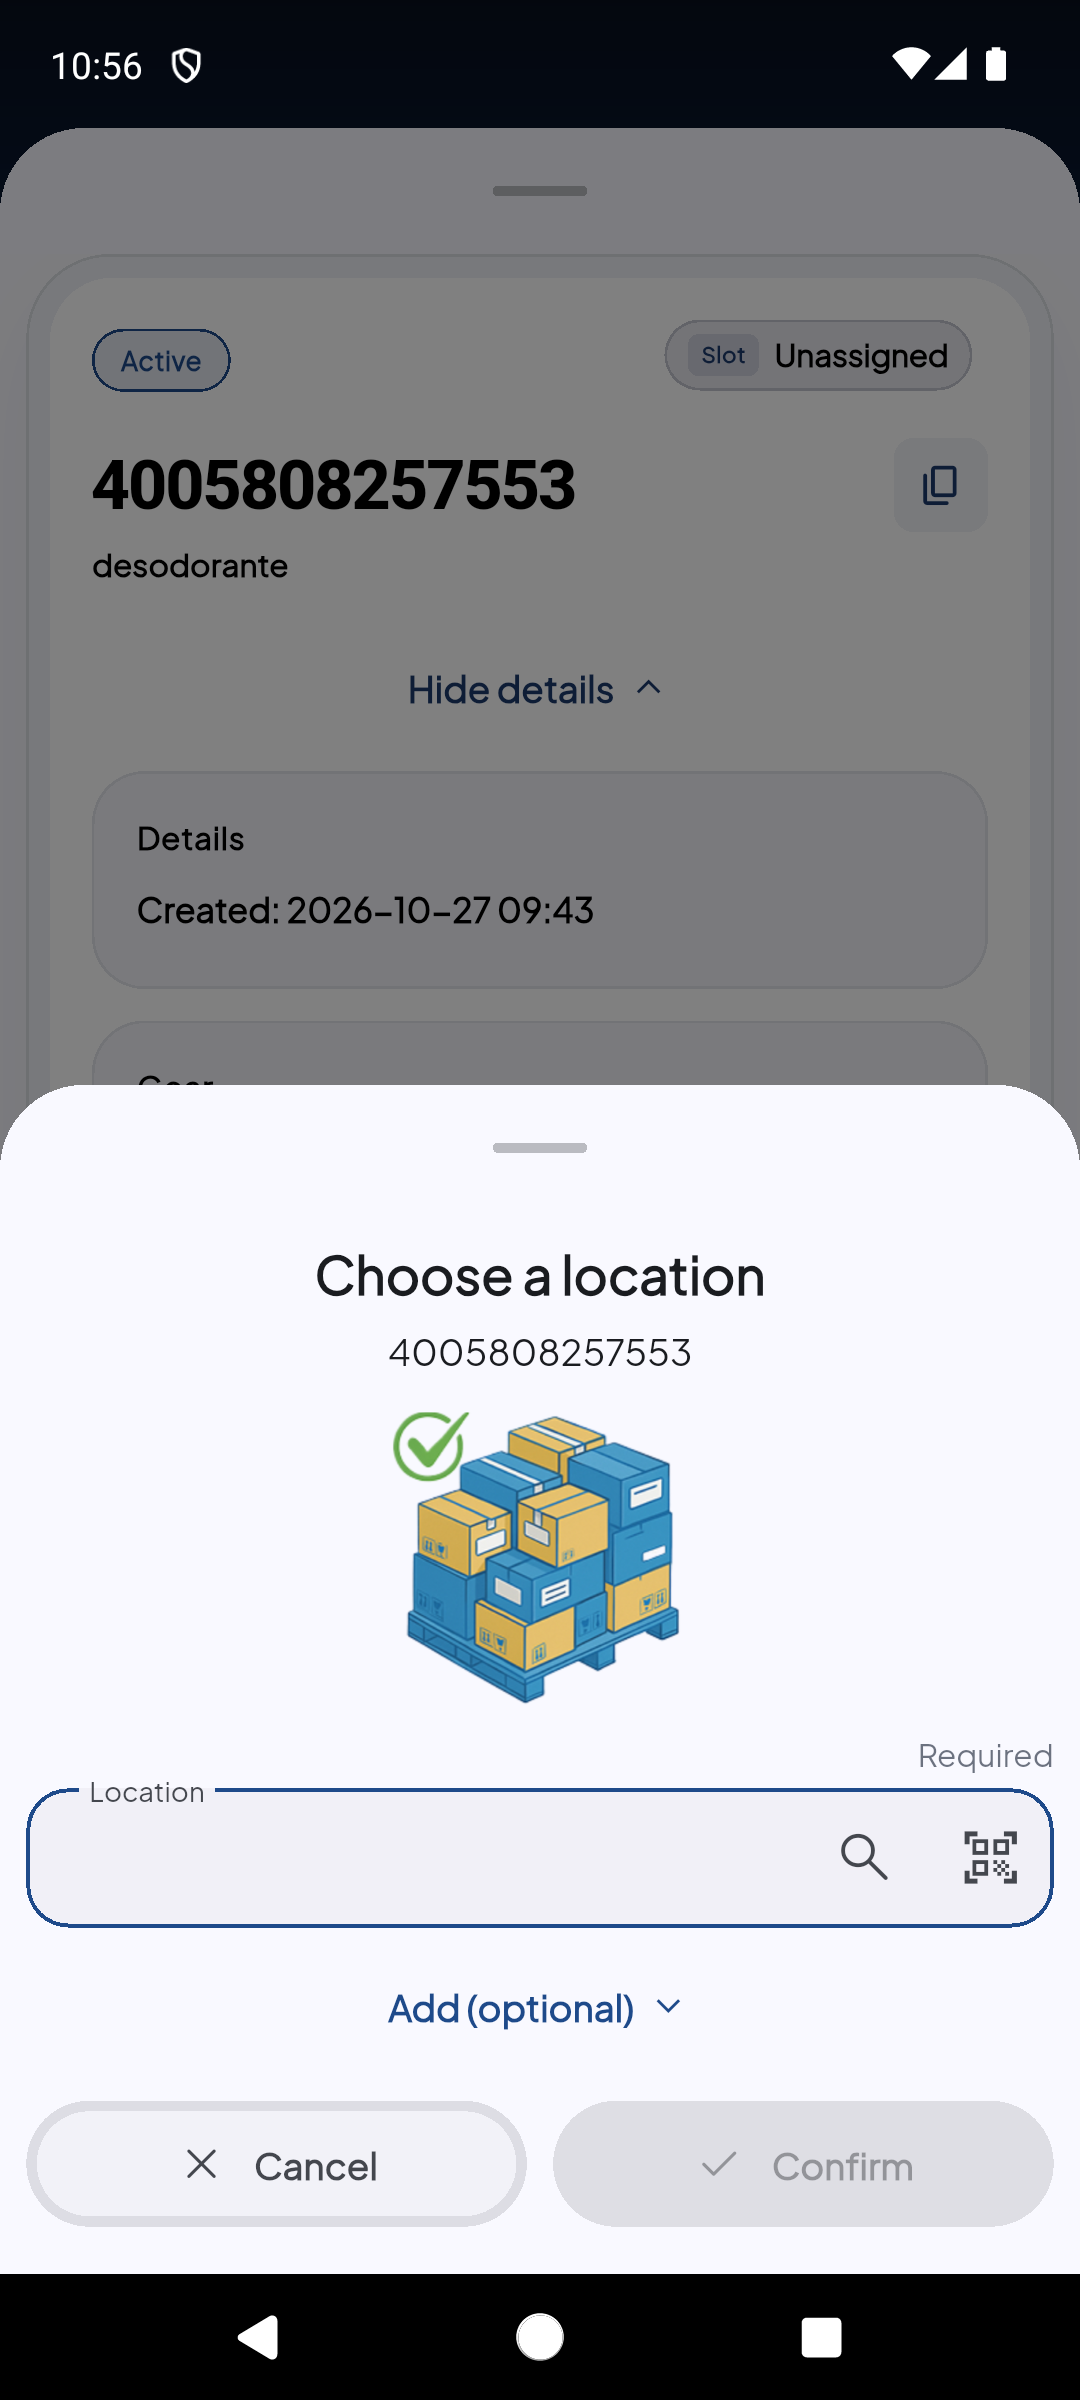
Select a new warehouse destination from the dropdown list or tap the barcode icon to scan the destination rack or bin label directly.
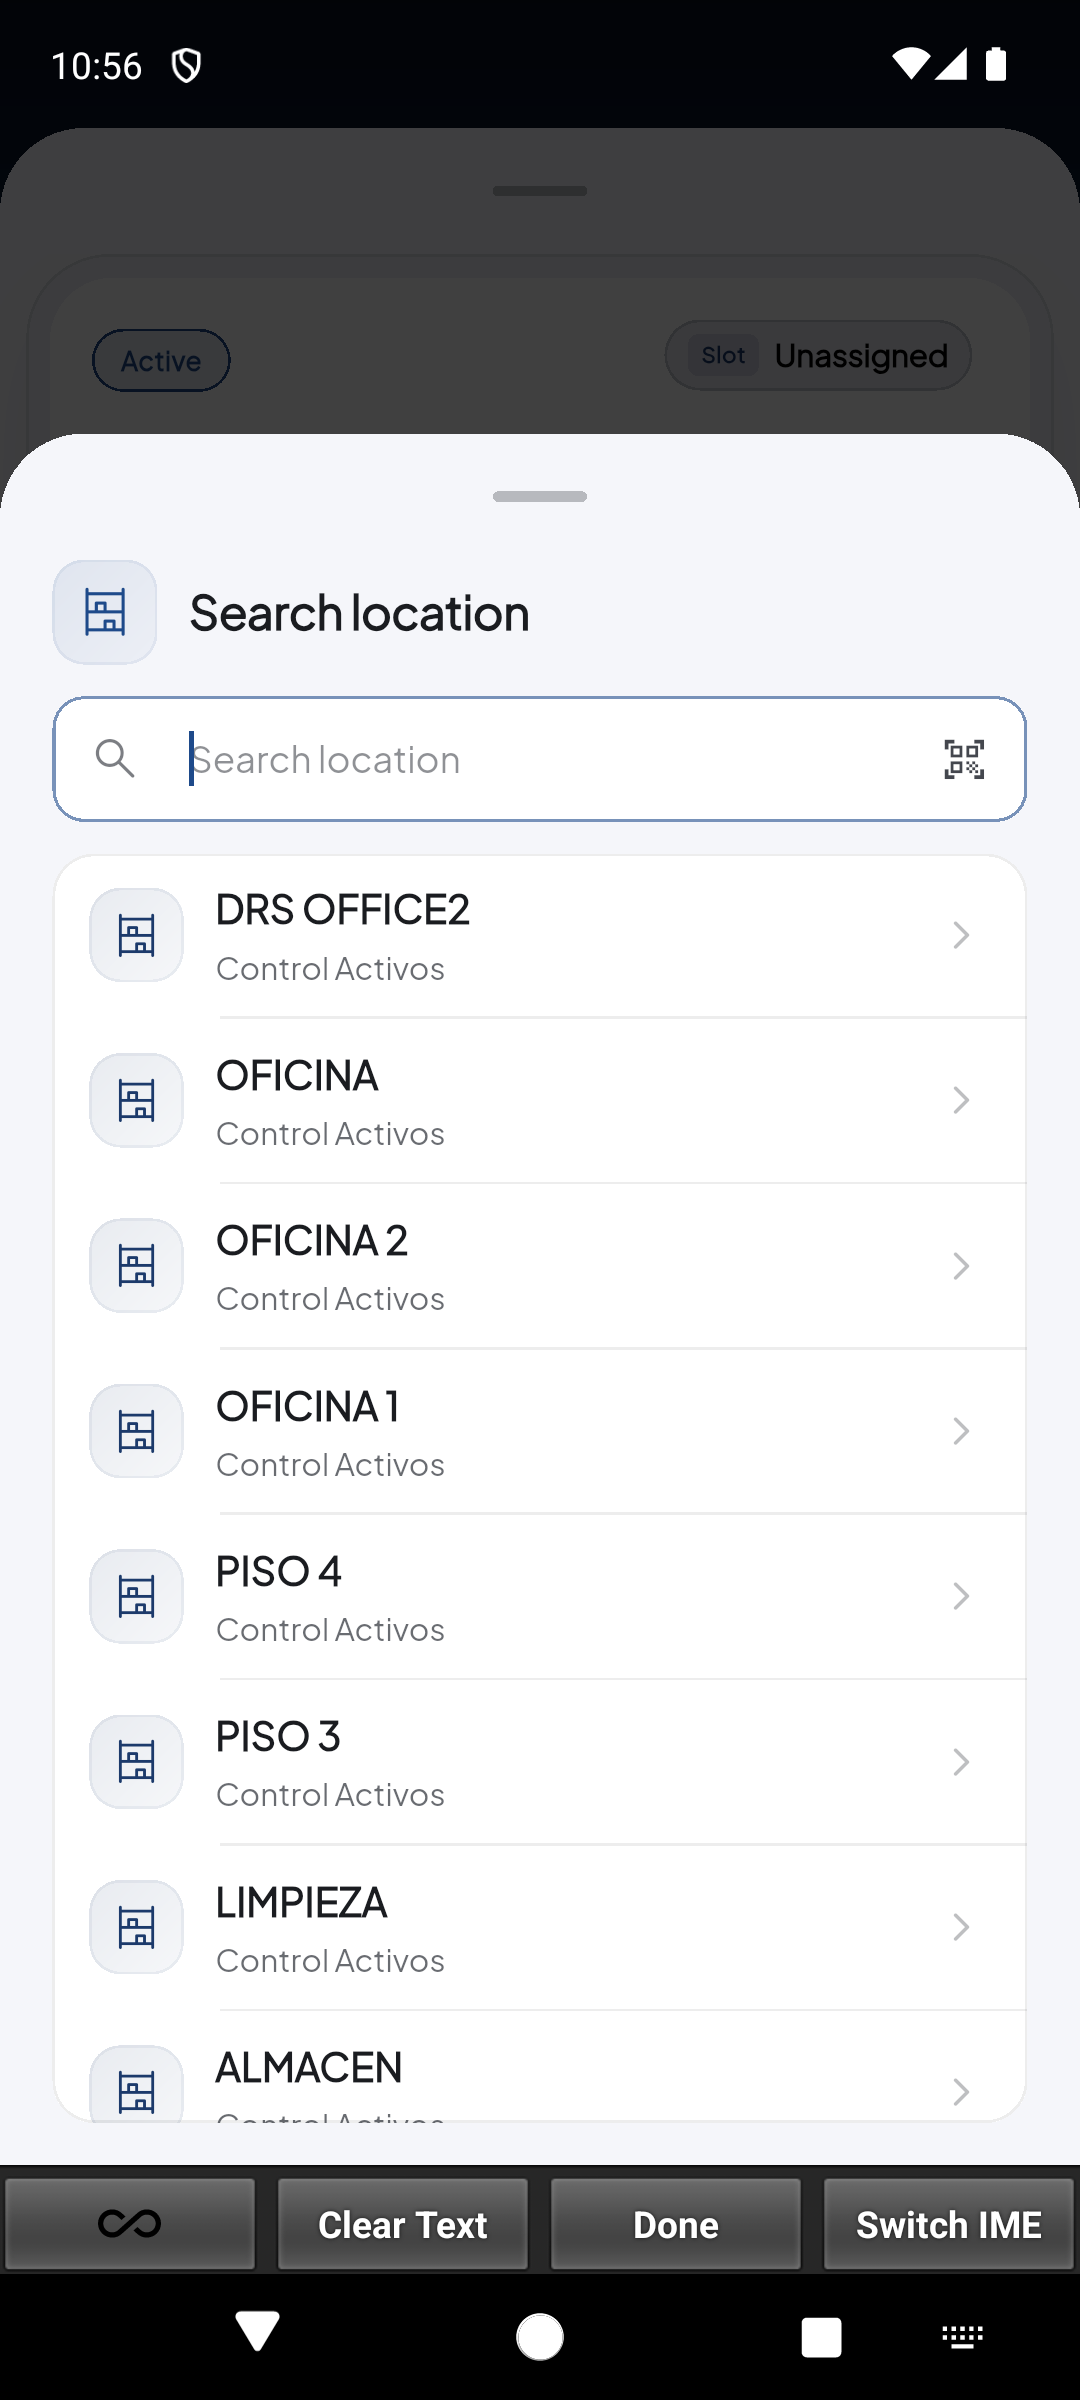
Browse all configured rooms, aisles, and storage slots in the facility ('OFICINA 1', 'PISO 3', 'LIMPIEZA', etc.) for rapid inventory transfers.
Demo completed!
Fast Search & Filtering
Section titled “Fast Search & Filtering”At the top of the Gear List screen, you have access to:
- Search Bar (“Scan tracking to move”): Search by tracking code, serial number, or item name. The list filters instantly as you type.
- Filter Modal Button: Opens a popup with two distinct filtering dimensions:
- Location: Filter by specific physical areas (such as
DRS OFFICE2,OFICINA,OFICINA 1,OFICINA 2,PISO 3,PISO 4,LIMPIEZA,ALMACEN) or chooseAll Locations. - Status: Filter between All, Active (in-service and operational gear), and Inactive (decommissioned, out-of-order, or retired gear).
- Location: Filter by specific physical areas (such as
Tapping the funnel icon opens the Filter Gear modal, allowing you to narrow results by combining location and operational status criteria:
Actions on an Asset
Section titled “Actions on an Asset”Tapping an item card in the list opens the Asset Detail Sheet:
| Action | Icon | Operational Function |
|---|---|---|
| Edit | ✏️ Pencil | Opens the editing form to update the asset name, description, tag taxonomy, and attach up to 10 photos. |
| Add Task | 📅 Calendar | Pre-fills the Schedule task creation form with this asset automatically linked as a target. |
| Move to location | 📍 Pin | Opens the relocation dialog to transfer the item to a new room, rack, or slot. |
| Deactivate / Activate | ⛔ Status | Toggles operational availability. Deactivated assets cannot be scheduled for active shifts. |
Tapping Edit opens the editing form where you can update the Tracking Number, Name, Description, assign classification Tags, and attach up to 10 photos of the equipment’s physical condition:
Relocation Workflow (Move to Location)
Section titled “Relocation Workflow (Move to Location)”To move equipment to another warehouse location:
- Open the asset sheet and tap Move to location.
- Select the destination using either method:
- Text Selection: Type into the Search location field or pick an option from the dropdown menu.
- Barcode Scan: Tap the barcode scanner icon next to the input to scan the destination rack or shelf barcode label.
- Tap Confirm to commit the transfer to the Shipedge backend audit log.
The location dropdown lists all enabled zones and slots in the facility, including offices, floors, cleaning areas, and warehouses:
Exporting Reports to CSV
Section titled “Exporting Reports to CSV”The Export CSV button in the lower-right area enables immediate data export:
- Compiles a comma-separated values file reflecting the currently filtered asset list.
- Includes fields:
ID,Tracking,Name,Location,Status,Tags,Last_Updated. - Allows sharing via email, saving to cloud storage, or opening in spreadsheet viewers directly from the device.